
If you run an online store, you want your product pages to stand out. A standard product page shows an image, a price, and an add to cart button. But what if you need to show more information, like detailed specs, sizing guides, or shipping info in an organized way?
Many Wix Studio users want to add custom elements, like tabs with text, to their product pages. A common question is whether these text elements can automatically show different information for each product. The good news is, yes, they can.
This guide will show you how to add dynamic elements to your Wix Studio product pages, making them more useful for your customers without any manual updating for each product.
How do you add elements to a product page?
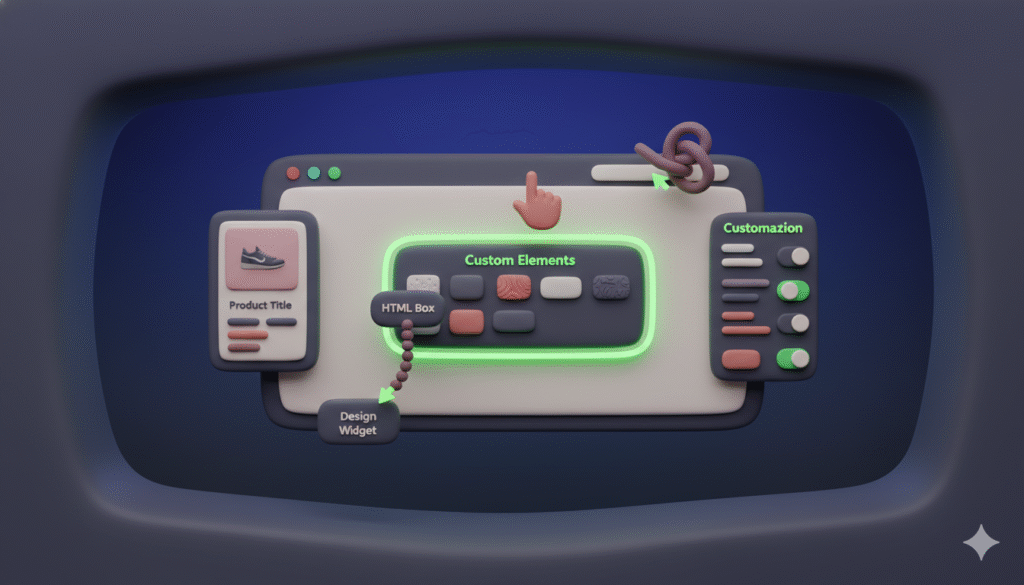
You can add almost any element from the Wix Studio editor to your product page. This includes text boxes, images, buttons, and especially useful elements like tabs.
To add an element:
- Open your Wix Studio editor.
- Navigate to the product page you want to edit.
- From the left-hand panel, drag and drop the element you want onto the page.
For organizing lots of text, the Tabs element is a great choice.
The challenge is not just placing the element, but making it smart enough to display unique content for each product in your store.
Can text elements show different info for each product?
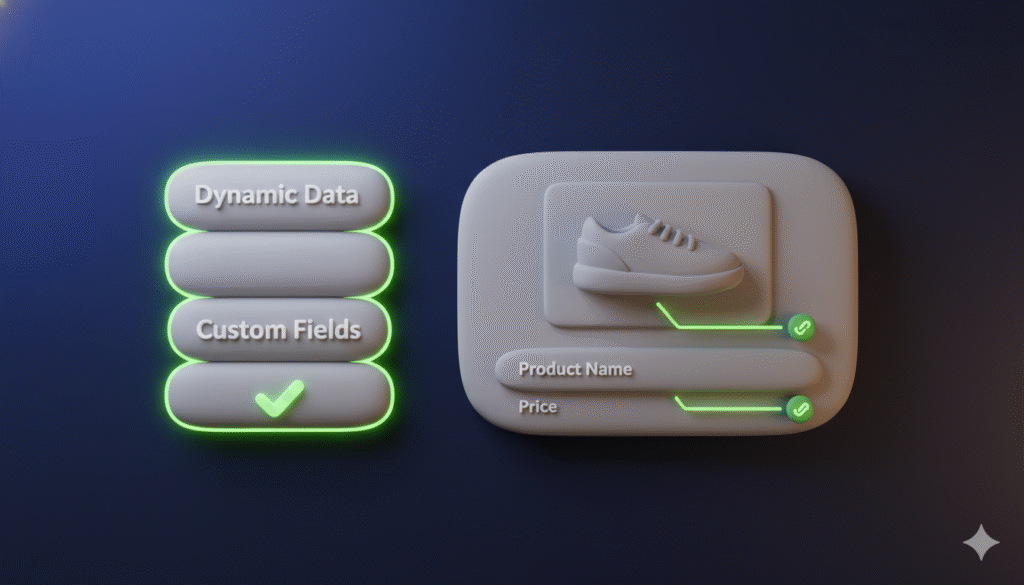
Yes, they can. This is the core of creating dynamic product pages. You do not have to create a separate page for every single product. Instead, you connect the text elements to the dynamic data of each product.
Wix Studio uses a system called dynamic pages. Your main product page is a template. When a customer views a specific product, Wix automatically pulls that product’s specific information (like its title, price, and description) and displays it in the template.
You can connect your custom text elements to this system. This means you can have a tab that shows “Materials” for one product and “Software Requirements” for another, all using the same page template.
How to connect a text element to product-specific data
Here is how you make a text element dynamic so it displays different text for each product.
1. Add a Custom Field to Your Product:
Go to your Wix Studio dashboard and open your products collection. Select or add a product. You will see a section to add Additional Info. This is where you can create custom fields. For example, you could create a field called tab_content.
2. Add the Text Element to Your Page:
Go back to your product page in the editor. Drag a text element to the desired spot, such as inside a tab section.
3. Connect the Text to the Dynamic Data:
Click the text element you added. In the settings panel, click Connect to Data. A menu will appear showing your product’s dynamic data. Select the custom field you created, like tab_content.
Now that text box is no longer static. It will automatically display whatever text you entered in the tab_content field for each individual product.
Step-by-step guide to adding dynamic tabs
Let us put it all together. Here’s how to add a tabs element with dynamic text inside.
1. Plan Your Content:
Decide what extra information you need. Common uses include “Features,” “Care Instructions,” or “Shipping Details.”
2. Add the Tabs Element:
In the Wix Studio editor on your product page, find the Tabs element in the Add panel and drag it onto your page.
3. Edit the Tabs:
Click the tabs element. Change the default tab labels to match your planned content, such as “Specifications” or “Reviews.”
4. Add a Text Box Inside a Tab:
Click the tab where you want the text. Then drag a text element into the content area of that tab.
5. Connect the Text Box:
With the text box selected, click Connect to Data and link it to the custom field you created.
6. Populate Your Products:
Go to your dashboard and fill out the custom fields for each of your products. The text you enter will automatically appear on the correct product page inside the tab.
Conclusion
Adding custom, dynamic elements to your Wix Studio product pages is a straightforward process. By using the built-in dynamic data features and custom fields, you can create rich, informative pages that automatically adapt to each product.